Your analytics stack is dying. Here's what's going to replace it
The monolithic martech stack is collapsing. An open source, warehouse-first intelligence platform is cheaper, more honest, and actually yours.
Steven Elliott•10 Mar 2026

If you want to automate data import into Google Analytics 4 then (at the time of writing) you will need to have that data available on an Secure File Transfer Protocol (SFTP) server as a CSV file. We wanted a simple Google Cloud based solution for the sole purpose of making that data available for the regular (i.e. daily, weekly, monthly) uploading of data into Google Analytics 4, where it can be joined alongside existing data to enrich and inform further insights, activations and all that malarky.
This tutorial therefore mostly focuses on setting up an SFTP server on Google Cloud Platform - but also incorporates the necessary aspects for public key authentication required by the Google Analytics Data Import.
There's plenty of tutorials for this bit, so I'll be quick.
Choose a local region and size / type of machine (I went for the closest and smallest):


For this tutorial, I selected CentOS as the boot disk then left everything else as default.
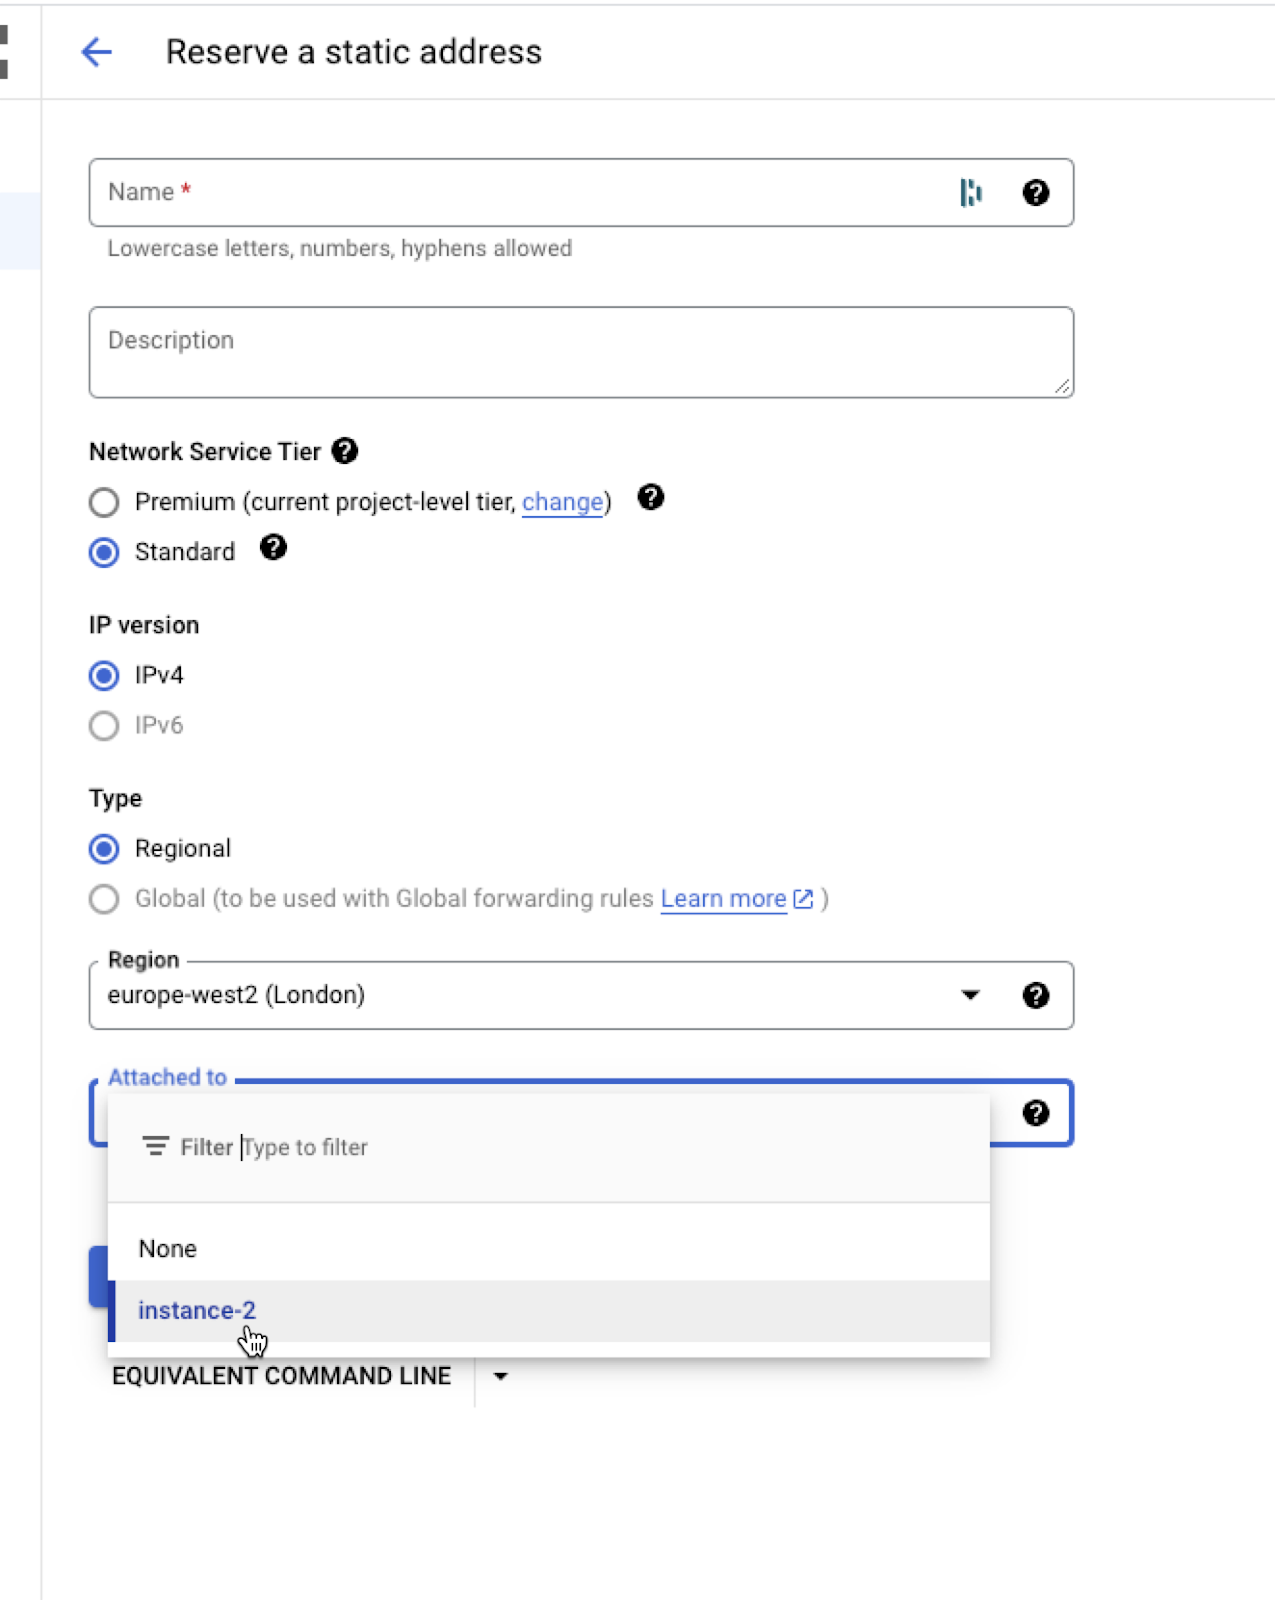
You will get an external but ephemeral IP address. If you want it to be static (it changes every restart) then head to VPC Network, reserve a fixed IP address - binding it to this new instance like so:
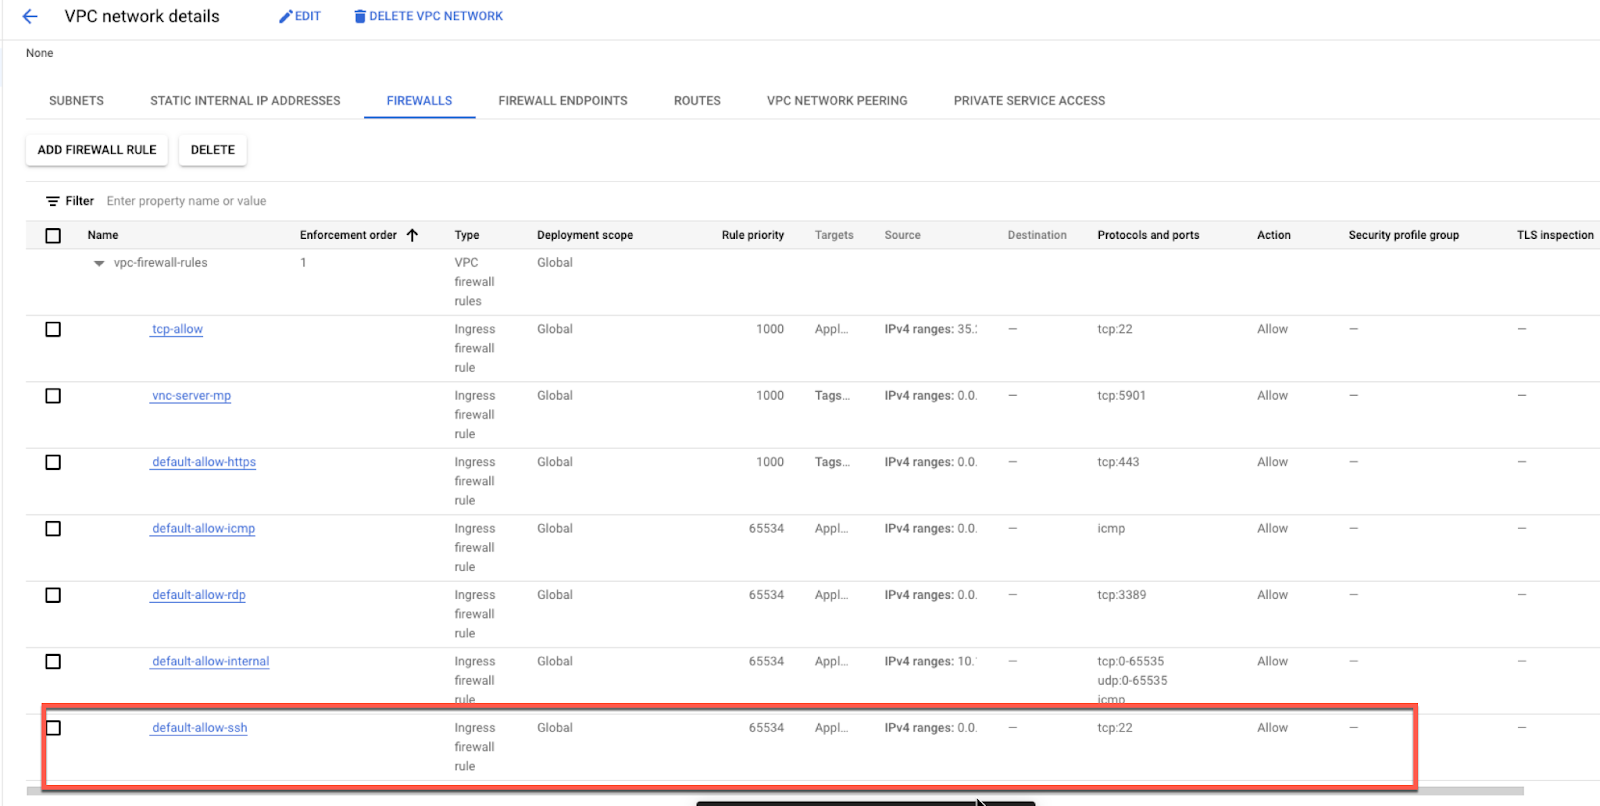
And also make sure your firewall rules allow port 22:
Here you will need to create the user(s) you are going to use and configure the SSH daemon (ie the service that is running on the VM that listens and responds to requests - typically on port 22).
Within Google console, you will be able to click the “SSH” button next to where the instance is listed, to SSH into the VM using the SSH-in-browser. This logs you in using SSH keys, passed to the browser.

Once logged in to your instance, via SSH, follow these steps:
First add a user (replace <username> with the user you need to create - I called it sftpuser):
sudo adduser <username>Now, assign a password to this user:
sudo passwd <username>Then, create a group restricted for this user:
sudo groupadd restrictedAnd add user to the group:
sudo usermod -g restricted <username>Configure SSH to be able to login with this user
Let’s go back to the SSH-in-Browser to step into the configuration of the SSH daemon, using the vi editor (see https://www.cs.colostate.edu/helpdocs/vi.html - it really is a dark art all to itself but comes bundled with Linux distros and is worth knowing the basics of for quick config file editing like this!)
sudo vi /etc/ssh/sshd_configfor now just uncomment this line
PasswordAuthentication yes
Then restart the ssh daemon with
sudo service sshd restartCheck that you can use the new user credentials by logging in with an SFTP client tool like Filezilla:
If all is working as expected, you should be able to login!
Using the credentials in the SFTP client tool of your choice, upload your CSV (formatted following the template from Google Analytics), like so:

Go grab the public key from Google (this is provided after you set up the transfer in step 3 ) and save it locally in a new file called authorized_keys.
The simplest way to transfer it will be to use the SFTP tool - so upload the authorized_keys file - like so:

Move the authorized_keys file to a newly created .ssh folder and ensure permissions on both the folder and file are both restricted such that just the user can read, write and execute:


Now in the SSH-in-Browser again to configure the SSH daemon:
sudo vi /etc/ssh/sshd_configScroll right down to the end of the file, now hit the i key to edit and add this (which will ensure any users in the restricted group are only used for SFTP):
Match group restricted
ForceCommand internal-sftp
Once added at the end, hit the esc key followed by :wq! to write and quit the file.
Then restart the ssh daemon with
sudo service sshd restartAnd, finally, you can watch the logs by running
sudo tail -f /var/log/messagesIf you want more detail in these logs, edit the sshd_config file again by looking for the Logging configs and edit accordingly:

This gives you more detail on connections that are being attempted and so on, which is useful if you need to debug. Remember to restart the daemon and then watch the the logs again with:
sudo service sshd restart
sudo tail -f /var/log/messages
(Note there’s a bunch of other configurations you could be adding here to pin things down further - see reading at the end of this tutorial.)
Using the credentials you created earlier, set up and map your data source in Google Analytics (note - the SFTP server URL follows the format sftp://<host>/<path to file><file>)

I won’t go into the mapping of the data itself - the purpose of this tutorial is to just get a simple SFTP server running on GCP and to have it using the public keys from Google Analytics for authentication.
Click Import now and see what happens! If you are still tailing the logs from above, you will see the connection being made by Google.
How to Setup a SFTP Server in Google Cloud Platform and Restrict Access | by Rubens Zimbres | Medium
Setting Up SFTP Public Key Authentication On The Command Line | JSCAPE
The monolithic martech stack is collapsing. An open source, warehouse-first intelligence platform is cheaper, more honest, and actually yours.
At the start of the year, if you’d asked us whether Measurelab would be standing shoulder to shoulder with Europe’s biggest consultancies by September, we would've been surprised. Not because we don't believe in ourselves, but because these things feel so distant - until suddenly, they’re not. So, here it is: we’ve been awarded the Marketing Analytics Services Partner Specialisation in Google Cloud Partner Advantage. What’s the big deal? In Google’s own words (with the obligatory Zs): “Spec
BigQuery just got a major upgrade, you can now plug directly into Vertex AI using the new AI.GENERATE function. Translation: your analytics data and generative AI are now best friends, and they’re hanging out right inside SQL. That opens up a whole world of new analysis options for GA4 data, but it also raises some questions: * How do you actually set it up? * What’s it good for (and when should you avoid it)? * Why would you batch the query? Let’s walk through it step by step. Step 1: H